一、实验目标 1、掌握视频API的操作方法;2、掌握如何发送随机颜色的弹幕。
二、实验步骤 (一)新建小程序项目并创建相关代码文件 (二)页面元素的创建与排版 1 2 3 4 5 6 7 8 9 10 11 12 13 14 <video id ='myVideo' controls > </video > <view class ='danmuArea' > <input type ="text" placeholder ="请输入弹幕内容" > </input > <button > 发送弹幕</button > </view > <view class ='videoList' > <view class ='videoBar' > <image src ="/images/play.png" > </image > <text > test</text > </view > </view >
1 2 3 4 5 6 7 8 9 10 11 12 13 14 15 16 17 18 19 20 21 22 23 24 25 26 27 28 29 30 31 32 33 34 35 36 37 38 video { width : 100% ; } .danmuArea { display :flex; flex-direction : row; } input { border : solid 1 rpx #987938 ; height : 100 rpx; flex-grow : 1 ; } button { color : white; background-color :#987938 ; } .videoList { width :100% ; min-height : 400 rpx; } .videoBar { width : 95% ; display : flex; flex-direction :row; border-bottom : 1 rpx solid #987938 ; margin : 10 rpx; } image { width : 70 rpx; height : 70 rpx; margin : 20 rpx; } text { font-size : 45 rpx; color :#987938 ; margin : 20 rpx; flex-grow : 1 ; }
(三)播放、切换视频逻辑实现 1、在videoBar组件中添加wx:for属性,设置为循环展示列表。
1 2 3 4 5 6 <view class ='videoList' > <view class ='videoBar' wx:for ='{{list}}' wx:key ='video{{index}}' > <image src ="/images/play.png" > </image > <text > {{item.title}}</text > </view > </view >
2、将js文件中的data属性中添加list数组,存放视频信息
1
2
3
4
5
6
7
8
9
10
11
12
13
14
15
16
17
18
19
20
21
22
23
24
25
26
27
28
29
30
31
32
Page ({ data : { list : [{ id : '1001' , title : '杨国宜先生口述校史实录' , videoUrl : 'http://arch.ahnu.edu.cn/__local/6/CB/D1/C2DF3FC847F4CE2ABB67034C595_025F0082_ABD7AE2.mp4?e=.mp4' }, { id : '1002' , title : '唐成伦先生口述校史实录' , videoUrl : 'http://arch.ahnu.edu.cn/__local/E/31/EB/2F368A265E6C842BB6A63EE5F97_425ABEDD_7167F22.mp4?e=.mp4' }, { id : '1003' , title : '倪光明先生口述校史实录' , videoUrl : 'http://arch.ahnu.edu.cn/__local/9/DC/3B/35687573BA2145023FDAEBAFE67_AAD8D222_925F3FF.mp4?e=.mp4' }, { id : '1004' , title : '吴仪兴先生口述校史实录' , videoUrl : 'http://arch.ahnu.edu.cn/__local/5/DA/BD/7A27865731CF2B096E90B522005_A29CB142_6525BCF.mp4?e=.mp4' } ] },
3、将videoBar组件添加data-url属性(用于记录每行视频的地址)和bindtap属性(用于触发点击事件)。
1 2 3 4 5 6 <view class ='videoList' > <view class ='videoBar' wx:for ='{{list}}' wx:key ='video{{index}}' data-url ='{{item.videoUrl}}' bindtap ='playVideo' > <image src ="/images/play.png" > </image > <text > {{item.title}}</text > </view > </view >
4、在js文件中的生命周期函数——监听页面加载中添加代码,用于控制视频的播放和暂停
1 2 3 4 5 6 onLoad (options ) { this .videoCtx =wx.createVideoContext ('myVideo' ) },
5、添加自定义函数playVideo,作用:
停止播放正在播放的视频
更新视频地址
播放新的视频
1
2
3
4
5
6
7
playVideo :function (e ){ this .videoCtx .stop () this .setData ({ src :e.currentTarget .dataset .url }) this .videoCtx .play () },
(四)发送弹幕逻辑实现 1、在video组件中添加enable-danmu和danmu-btn属性,设置允许发送弹幕和显示发送弹幕的按钮
1 <video id ='myVideo' controls src ='{{src}}' enable-danmu danmu-btn > </video >
2、在文本输入框中添加bindinput属性,用于获取弹幕文本的内容。为按钮添加bindtap属性,用于触发点击事件。
1 2 3 4 <view class ='danmuArea' > <input type ="text" placeholder ="请输入弹幕内容" bindinput ='getDanmu' > </input > <button bindtap ='sendDanmu' > 发送弹幕</button > </view >
1
2
3
4
5
6
7
8
9
10
11
12
13
sendDanmu :function (e ){ let text=this .data .danmuTxt ; this .videoCtx .sendDanmu ({ text :text, color :'red' }) }, getDanmu :function (e ){ this .setData ({ danmuTxt :e.detail .value }) },
并在默认数据的data中添加damuTxt:''
随机生成颜色的函数:
1
2
3
4
5
6
7
8
9
function getRandomColor ( let rgb=[] for (let i=0 ;i<3 ;i++){ let color = Math .floor (Math .random ()*256 ).toString (16 ) color = color.length == 1 ?'0' +color :color rgb.push (color) } return '#' + rgb.join ('' ) }
将sendDanmu函数中color的red改为getRandomColor()
color:getRandomColor()
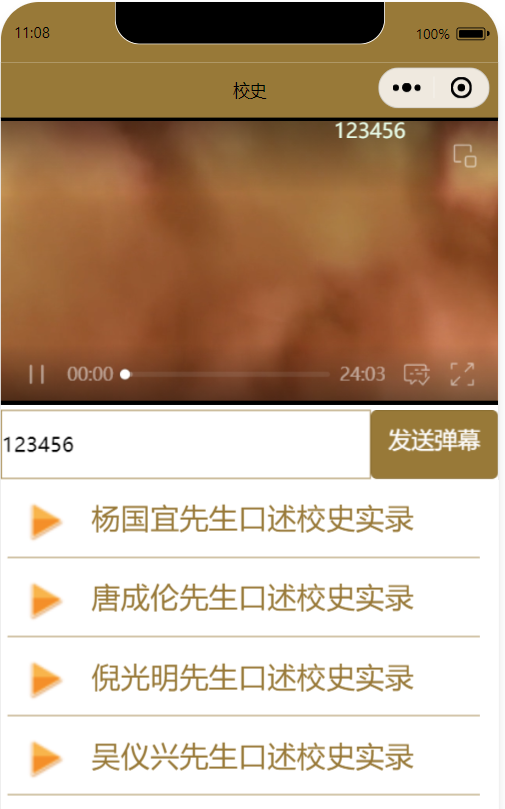
三、程序运行结果 四、问题总结与体会 实验中,按照学习视频完成了发送弹幕的编写,但是测试过程中并没有成功显示弹幕。仔细检查发送弹幕以及获取弹幕的函数时发现,有一个弹幕的变量名拼写错误。在编写代码时要注意各变量名的统一性。